Powered By Blogger

Tuesday, October 11, 2011

TAGINE COOKING FOR THE CHEFS- BY CHEF RAMAN

 TAGINE COOKING FOR THE CHEFS- BY CHEF RAMAN


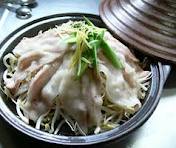
Home chefs are often searching for new cooking methods or approaches to enhance their food, and one such technique that people might perhaps not even have tested is tagine cooking. Tagine cooking has been around for hundreds of years. Tagine cuisines are given their names for the earthenware pot, typically a flat circular plate which is covered by a large domed cover which remains on the plate in the course of the cooking process, which originates from North Africa and are typically associated with Moroccan cuisine
Tagines usually come in two varieties, 
which are cooking and serving, with both of them basically being the same thing save for the fact that the serving ones are commonly glazed and colorfully decorated. The early tagines were used by the nomadic Berber of Morocco, and tagine cooking was habitually carried out over charcoal with the most regular ingredients containing lamb, poultry and fish. The tagine became favored due to the fact that it needs very tiny bit of water, a rare material in that part of the world. Also, with this cooking technique you can surely cook ingredients for hours with the domed top covered for circulating water vapor inside the dish to keep the food wet whilst also saturating the food with oil as well as seasonings.

Before you go into the fundamentals of tagine cooking, 
it's a fantastic idea to get ready your tagine first so that you could will be able to obtain ideal results. Submerge your tagine in water for a couple of hours, after that coat the base as well as the cover interior with some olive oil, then place it in an unheated oven, before increasing the heat to 350 degrees Fahrenheit. After 2 hours, remove the tagine and allow it to cool. You might then repeat the olive oil process before storing it.
A brief online search can reveal thousands of distinct recipes for you to try, with many of them relying on conventional lamb and chicken ingredients. The entertaining part of tagine cooking is that you can easily experiment with different vegetable and herbs, all aiming at providing your many alternatives with distinctive flavors every time. 
The actual cooking time can possibly be anywhere from 45 mins to a few hours, so be sure to refer to each instruction for the exact cooking time, especially if cooking for visitors, and no matter how rushed, makesure that you never set your tagine over high heat as this can most likely crack and damage the dish. 
With appropriate care of your pot, you can absolutely be cooking fantastic brand-new meals for years to come.


Wednesday, October 5, 2011

Food and its Types - Chef Ramandeep Anand

Food and its Types - Chef Ramandeep Anand


Food is the basic necessity for all of us and we all earn money to get this basic necessity. We need to eat 3 meals a day to keep our body running so that we can manage our daily functions. Many of us " Eat food to live" while there are others who "Live to eat food". In fact, nutrition assumes a special importance in each and everyone's life.

Types of Foodstuff

The food is normally divided into two main categories given below:-

1- Vegetarian food- These include stuffs like milk, fruits and vegetables. These are those stuff that are obtained from plants and trees.

2- Non- Vegetarian food- These include stuffs like meat and meat products, chicken, turkey, fish, squid etc. Non vegetarian food are generally obtained by killing animals.

Nutrition from Foodstuff

Nutrition from food is necessary and without this daily dose of nutrition animals may not survive for long. It is important to support life as nourishment obtained helps the cells present in our body to carry out its routine functions. Different stuffs provide different levels of nutrition. The nutrients are divided into six classes which are given below:-
1- Carbohydrates- These provide energy to the body and are found in items like rice, bread and other grain products.
2- Fats- It consists of a group of compounds that are generally insoluble in water. These are found in items like butter, ghee, fish oil, lard etc. Fats are stored in the human body for use at a later use for energy.
3- Minerals- These are needed for the maintenance of proper functions in the body like the transport of oxygen throughout the body, stimulating growth, normalizing the nervous system etc. Minerals can be found from a variety of food items such as meat, cereals including cereal products such as bread, fish, milk and dairy foods.
4- Protein- These are important components of muscles, skin and hair. Proteins are helpful in creation of various enzymes in the body that control various important functions. Major sources of protein include milk, meat, fish, egg, and vegetables.
5- Vitamins- They are an essential component of animal body required for good health. It is organic compound required as a nutrient. Good sources of vitamins are fruits, vegetables, cereals, milk and eggs.
6- Water- It is popularly known as the"elixir of life". The human body comprises of 55-78 % of water. It is required for the essential functioning of the various important parts of the human body.


Thus, these points given above reflect the importance of food and nutrients in our diet. As long as a human is alive, he needs water and foods in the required quantity.


Sunday, August 28, 2011

which one is better Organic milk OR Regular Milk- BY Chef Raman


Which one is better Organic milk OR  Regular Milk- BY Chef Raman
The debate has been raging on about organic milk vs regular milk in recent times, and with dramatic shifts happening all around the world in the dairy industry that means that the milk you drink today is vastly different from the one you drank as you were growing up. Typically, the milk that passes as "regular" these days are chock full of all kinds of hormones and artificial ingredients that may prove harmful to your health. The only way that you can  ensure that you are not affected by any of these changes is to make the switch to organic, but obviously when you consider that organic milk vs regular milk is almost 2x as costly, there is a real dilemma.    
The Case For Organic Milk Vs Regular Milk
Essentially, milk classified as organic has to pass more stringent standards than milk classified as regular, which means that it won't have all the additives like growth hormone, antibiotics and other potentially harmful chemicals. While generally the consensus is that it's yet to be proven that these additional stuff will cause real harm to us, why risk your   
                                                                         THe best of Organic Milk would be Sheep Milk 
                                                                                 
health over a few dollars and cents? These days, cancer and other serious disorders and diseases are on the rise, and who is to say that that's not partly down to all the changes that's been happening in the food industry and how livestock and produce are raised?
Honestly, you would be shocked and appalled if you knew what cows have to go through in the case of the latter of organic milk vs regular milk. In the case of the former, cows have free rein to graze and move about the pastures, whereas "regular" cows don't. Additionally, they are milked very frequently and are pumped with all kinds of chemicals to ensure they produce larger and larger quantities. Based on logic alone, you can understand why there's a growing concern about so called normal milk.
So Which One to Choose?
Regular MIlk
Well, if you can afford it, I would definitely recommend making the switch to organic milk vs regular milk, considering all the health risks involved. Granted, they are not proven or documented, but obviously you don't want to wake up one morning to find out some drastic headlines about organic milk vs regular milk and realize that it's too late because you've been drinking "regular" your entire life would you so it's better to be safe than sorry really.


Tuesday, August 9, 2011

What are the different types of Papadams and how are they made? BY CHEF RAMAN


What are the different types of Papadams and how are they made? BY CHEF RAMAN
PDFPrintE-mail
Poppadums or the Indian papad occupies an important place in Indian cuisine. While it is a well known snack or appetizer in North Indian cuisine, it is an important part of all South Indianmeals and is known as Papadam. Papad is a form of flat bread, wafer or a tortilla that is crisp and thin. Generally rice flour, black gram, chickpea or lentils are used to prepare this wafer thin appetizer. You can get different types of poppadums depending on your palate and preferences that range from versions made from lentils, spicy or even plain. Sometimes even Tapioca or sabudana and jackfruit is also used to prepare papads.
 

In recent years, new factories and machines have started being used to make papads, but handmade papads are still popular in India. As a matter of fact, this cottage industry is a major source of income for women in many parts of the country.
 

Basic poppadums are prepared with lentil flour that is mixed with sodium bicarbonate, spices, and salt along with water to prepare dough. This dough is kept aside for sometime and then is cut into round balls. These round balls are rolled into paper-thin papads that are almost translucent. They are dried in the sun and then made into packages to be sold in the market.

There are a number of ways to cook a poppadums depending your tastes and preferences. Health conscious people like roasting them while some like the deep fried versions. Papads curry is also popular in North India.

Here are some well known ways of cooking poppadums:


• Open flame cooking: You can use a gas stove to cook a papad. It is one of the quickest ways to cook it and the oldest too. All you need to do is to use some tongs to hold the papad over the flame. Keep moving it back and forth so that it doesn't burn and cooks all over. This method does not take more than ten seconds and you have a low calorie snack ready in seconds!

• Deep-fried papads: Deep fried papads are a popular snack for parties and get together. Heat some vegetable or sunflower oil and slide the papad gently into it. Within no time, the papad is cooked and rises up. You can take it out with a pair of tongs and place it on a paper towel to drain the excess oil.

• Microwave: This is one of the most preferred ways to cook papad these days. It does not add any calories to the papad and does not burn it either. You can simply put the papad in the microwave and cook it for about 15 seconds on either side on full power. Some people prefercooking it for sixty seconds on low power.

You can cook poppadums in any of the ways mentioned above. These can be eaten with chutneys or sauce or on their own. Cholesterol free and tasty, papads are one of the best snacks for a growling tummy!c

Sunday, July 17, 2011

liquid nitrogen In cooking By Chef Raman

liquid nitrogen In cooking By Chef Raman


Nitrogen is one of the most abundant elements in the Earth's atmosphere. The air we breathe is almost 80% nitrogen, a colorless, odorless and tasteless gas. Despite its abundance, its use in cooking is a relatively new development. But it has spectacular results.

The pioneer in experimenting with this amazing culinary technique was the French physicist and chemist Hervé This in the mid-nineties, followed by the chefs Heston Blumenthal and Ferran Adrià, who opened up new avenues that led to its widespread use today.

In cooking, nitrogen is used in its liquid state, characterized by a temperature of -196ºC / -320ºF, which means that everything it touches "freezes" instantly.


What is needed?

You need a specially designed recipient for liquids at low temperatures, usually made from stainless steel to prevent breakages and with an inside coating of cork or Teflon to minimize evaporation. Apart from this, handling involves a series of special measures, such as heavy gloves and keeping contact time to a minimum.

The only special precaution required is that it must be used in well-ventilated areas and must never be mixed with other liquids except under controlled conditions.   

What is its culinary use? With liquid nitrogen you get almost instant freezing for any product it comes into contact with. The cold has a similar effect on food as heating, removing the liquid content.  This means that it not only changes the original appearance of food, but also its texture, so you can obtain powdered oil, for example, or frozen foams.

It also enables you to play with temperature contrasts so you can serve a dish in which the inside ingredient is cooked and kept at its ideal eating temperature, while the outside is completely frozen.

Another use is for obtaining a liquid at room temperature separated from the outside by a thin film, or for making ice-cream by freezing the creamy base instantly.

Its produces better results with products that have a higher fat content, but the results are less eye-catching on foods with a higher water content.

What are the benefits?
Apart from its creative potential in cooking, the liquid nitrogen technique can also speed up cooking times by eliminating any bacterial growth or freeze fluids with minimum ice crystal formation. It also freezes foods that cannot be frozen in a normal freezer cabinet (where the temperature only drops to about -32ºC) and also products with a high alcohol content.
Its application enables new cocktails to be invented, involving new sensations, such as the so-called "dragon effect", in which the vaporized nitrogen swallowed comes out of the drinker's nose, with striking results.

Saturday, May 14, 2011

Dehydrated Foods and Freeze Dried Foods- By chef Raman


Dehydrated Foods and Freeze Dried Foods- By chef Raman


Are you wondering what the differences are between freeze dried foods and dehydrated foods? 


There are a number of differences:- 


First of all, the processes used to preserve the food and prevent spoilage and enzymatic breakdown are very different. Other factors you may want to consider are cost, shelf life, taste, texture, and nutritional value.

Dehydration removes moisture from the food by the circulation of hot dry air. The water evaporates. This prevents the growth of microorganisms. Oxygen, heat, light, and moisture all contribute to the breakdown of nutrients and spoilage of food. Due to the use of heat, some of the nutritional value will be lost. Using an electric dehydrator will preserve more nutrients than some of the other methods of dehydration. Dehydrated food is light and generally less expensive than freeze dried food.

However, it does have more changes to texture, aroma, taste, and nutritional value. It can have a shelf life of up to twelve years when stored properly. Re-hydration time is generally up to 20 minutes in boiling water and can be up to two hours in cold water.

Freeze drying removes water from the food by 

sublimation. 


The food is sealed in a vacuum chamber which forces the air out. Freeze drying uses temperatures between -50 degrees Celsius and -80 degrees Celsius. This vaporizes the ice. Because of this, freeze dried food retains more nutrients, and much of its original aroma, texture, and flavor. Freeze dried food is light and usually more expensive than dehydrated food. The process can take several days and the equipment is expensive.

Freeze dried food has a longer shelf life than dehydrated food because up to 98 percent of the moisture is removed. The shelf life can be up to twenty five years when stored properly. Re-hydration time is generally 5 minutes in hot water and up to 10 minutes in cool water.


Dehydrated and freeze dried foods are great for back packing as they are light and easy to prepare. They are both excellent for long term food storage. Both reduce the waste of throwing away fresh produce that has spoiled. However, if nutritional value and taste are a top priority for you then I would recommend choosing freeze dried foods over dehydrated foods. The flavor, texture, and aroma win every time.


Thursday, April 21, 2011

Freezer Burns- By Chef Raman

Freezer burns....- BY CHEF RAMAN

 Freezer burn is a condition that occurs when frozen Food has been damaged by dehydration and oxidation, due to air reaching the food. It is generally induced by substandard (non-airtight) packaging.

Freezer burn is not a food safety risk. It appears as grayish-brown leathery spots on frozen food, and occurs when air reaches the food's surface and dries out the product. This can happen when food is not securely wrapped in air-tight packaging. Color changes result from chemical changes in the food's pigment. Although undesirable, freezer burn does not make the food unsafe. It merely causes dry spots in foods.

The condition is primarily caused by Sublimation. Water evaporates at all temperatures, even from what appears to be solid ice. When the constantly oscillating water molecules in the meats and vegetables stored in the freezer migrate to the surface, crystals of ice outside of the solid food are formed. The parts now deprived of moisture become dry and shriveled and look burned. In meats, air can cause fats to oxidize.

Meats and vegetables stored in a manual defrost freezer will last longer than those stored in automatic defrost freezers. That is because the temperature of a manual defrost freezerremains closer to 0 °F/-18 °C while the temperature of automatic defrost freezers fluctuates. Food with freezer burn, though dried and wrinkled, is safe to eat. However, food afflicted with freezer burn may have an unpleasant flavor. In most cases, it is sufficient to remove the parts affected by freezer burn.

This shows the clear case of Freezer Burn

Tips for Freezing and Thawing Foods


Freeze-Safe Tips
  • Freezer temperatures should never go above 0°F; fluctuating temperatures can affect the quality of frozen foods.
  • Supermarket wrappings are safe for most foods frozen 1 to 2 months, but for best quality, overwrap packages with heavy-duty freezer materials or store in plasticfreezer bags.
  • Cool foods quickly before packaging. Don't let food stand at room temperature longer than 30 minutes before freezing.
  • Freeze food as soon as it is cooled to room temperature (or refrigerate in shallow containers uncovered until cooled, then package and freeze).
  • Label all foods with recipe name, date, number of servings, thawing and reheating directions and "use-by" date.
  • Do not overload your freezer with new foods; add no more than 2 to 3 pounds of food per cubic foot of freezer capacity so air can circulate for proper freezing.
  • Leave space between packages so air can circulate around them.
  • If you are unsure about the quality of certain foods after freezing, freeze a small amount first and test for quality after thawing and reheating.
  • Frozen raw foods that have been cooked can be refrozen (i.e., fresh chicken —> packaged and frozen —> thawed —> cooked —> frozen —> thawed —> reheated).
  • You can refreeze unused portions of cooked foods that have previously been frozen and thawed in the refrigerator.
  • Seal containers with as little air as possible unlessfreezing liquid or semiliquid foods that expand when frozen. Leave a 1 1/2-inch space below the rim to allow for expansion.
  • When freezing casserole dishes or containers with empty space between the food and lid, fill "dead spaces" with crumpled wax paper.
  • Store food in 1-gallon freezer bags; press out all the air and seal tightly so bags can be stacked on top of each other.
  • Do not freeze tomato-based or other acidic foods in aluminum baking pans, or cover them with aluminum foil.
How to Prevent Freezer Burn
  • Freezer burn occurs when foods are frozen for an extended period of time or not properly wrapped and sealed. Even though these foods do not pose any health risks, the freezer-burned areas will be dried out and tasteless. For best results, cut awayfreezer-burned portions before or after cooking.
  • When wrapping foods for freezing, get as much air out as possible so moisture cannot get in. Vacuum-packing in FoodSaver® bags removes the air and keeps moisture out so foods can be frozen longer without freezer burn.
  • Use moisture- and vapor-resistant packaging that can be tightly sealed.
Thawing Foods Safely
  • NEVER defrost perishable foods (meat, poultry, fish/seafood, dairy, eggs) outdoors, in a cold room in the house or on the kitchen counter.
  • Refrigerate meat/poultry/seafood or casseroles 24 to 48 hours or until completely thawed. Foods thawed in the refrigerator can usually be safely refrozen without changing taste or quality.
    • Allow 8 hours per pound of meat.
    • Allow 4 hours per pound of poultry.
    • Allow 6 hours per pound of fruit or vegetables.
  • For fast thawing, place frozen packages in a watertight, sealed bag and cover with cold water. Change water every 30 minutes until food is completely thawed.
  • In microwave oven:
    • Remove food from store wrapping (foam trays or plastic wrap) that may release chemicals into foods.
    • Allow 6 to 8 minutes per pound of food when thawing in microwave on low heat. Once food is defrosted, reheat on high heat.
  • Precooked foods low in moisture content (breads, cakes, cookies) can be thawed at room temperature.
  • Precooked foods higher in moisture content and/or containing dairy or egg products should be thawed in the refrigerator.
Reheating
  • Reheat all previously cooked food to an internal temperature of at least 165°F. The food must reach this temperature within 2 hours. If the food will not reach this temperature within 2 hours, reheat it in small batches to shorten the reheating time.
  • Use a clean meat thermometer to check internal food temperatures.
  • Reheating frozen food without thawing:
    • Bake at 300 to 350°F for almost double the original cooking time.
    • Cooking frozen foods at higher temperatures does not result in quicker cooking. Higher temperatures will cook the outside before the inside is completely thawed.
  • Microwave reheating:
    • Cook until foods are steaming and hot (at least 165°F).
    • Cover foods with microwave-safe wrap; vent to prevent steam buildup.
    • Stir foods from the outside in to encourage even heating.
    • CAUTION: Be careful when opening microwaved plastic bags as steam can build up and cause burns when bags are opened.
    • When microwaving food in a FoodSaver bag, be sure to snip off a corner for venting.